


Node.js is a widely used, event-driven JavaScript runtime for building dynamic web applications. If you're familiar with creating Node.js apps but want to host them on a shared server, you need to configure the server environment. With cPanel, you can easily set up a virtual environment within your shared hosting account to run your Node.js app.
Here's how:
- Log in to cPanel.
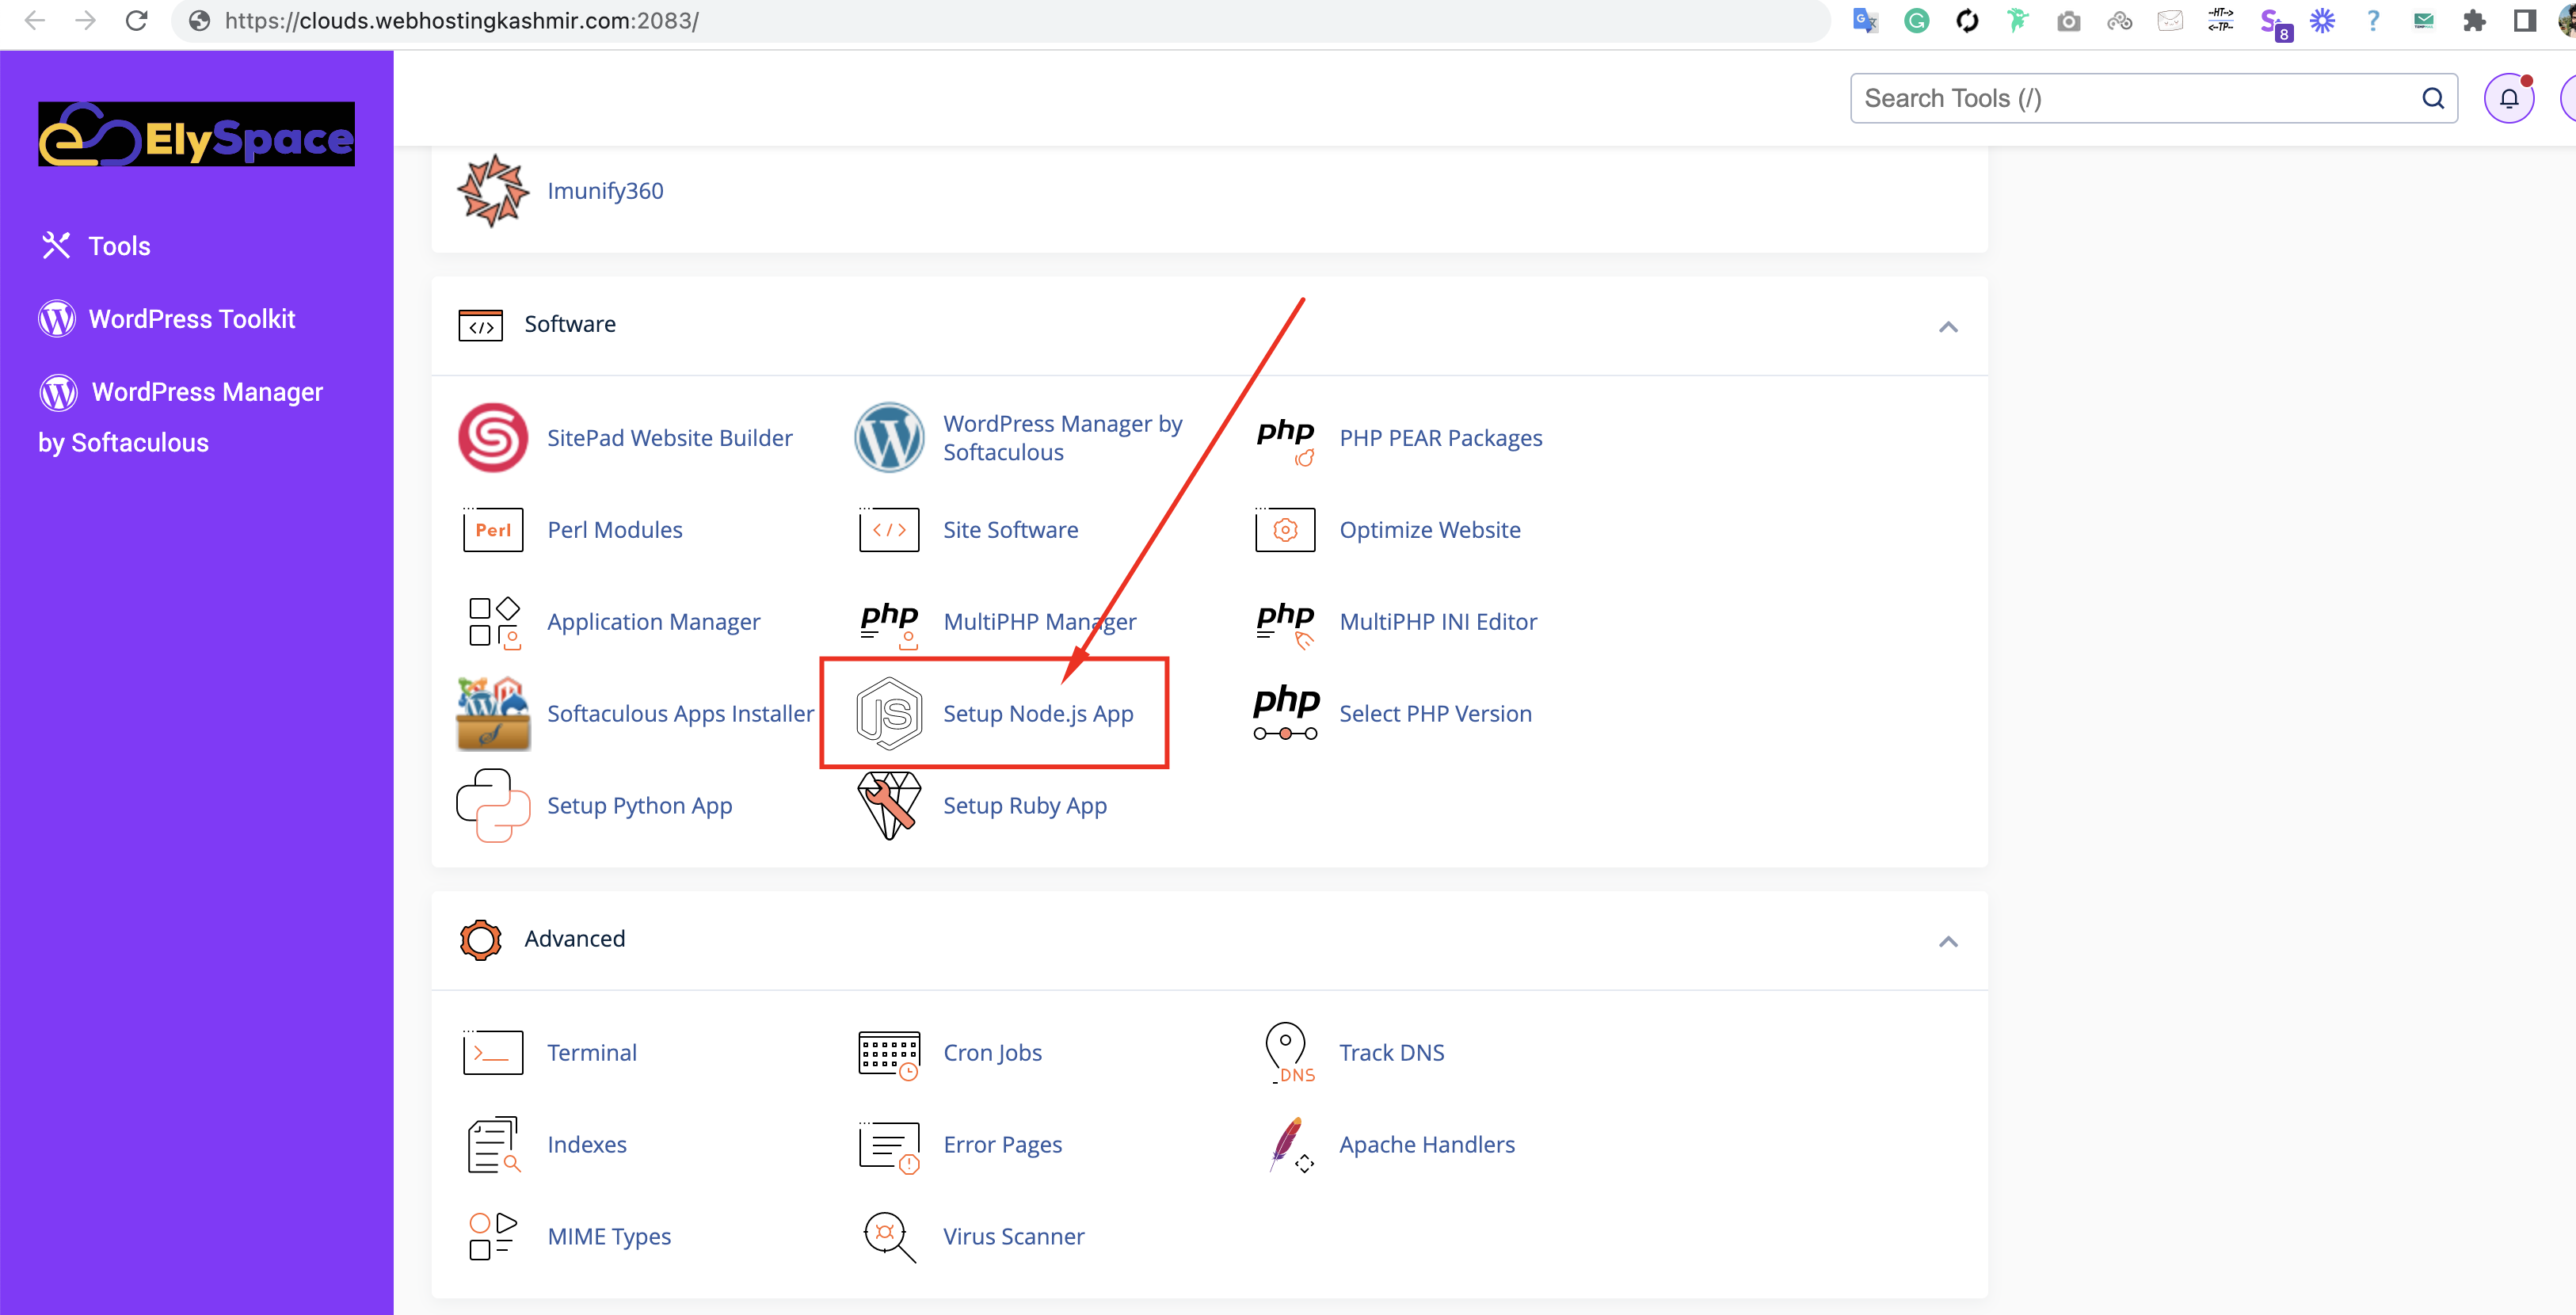
- Go to Software and select Setup Node.js App.
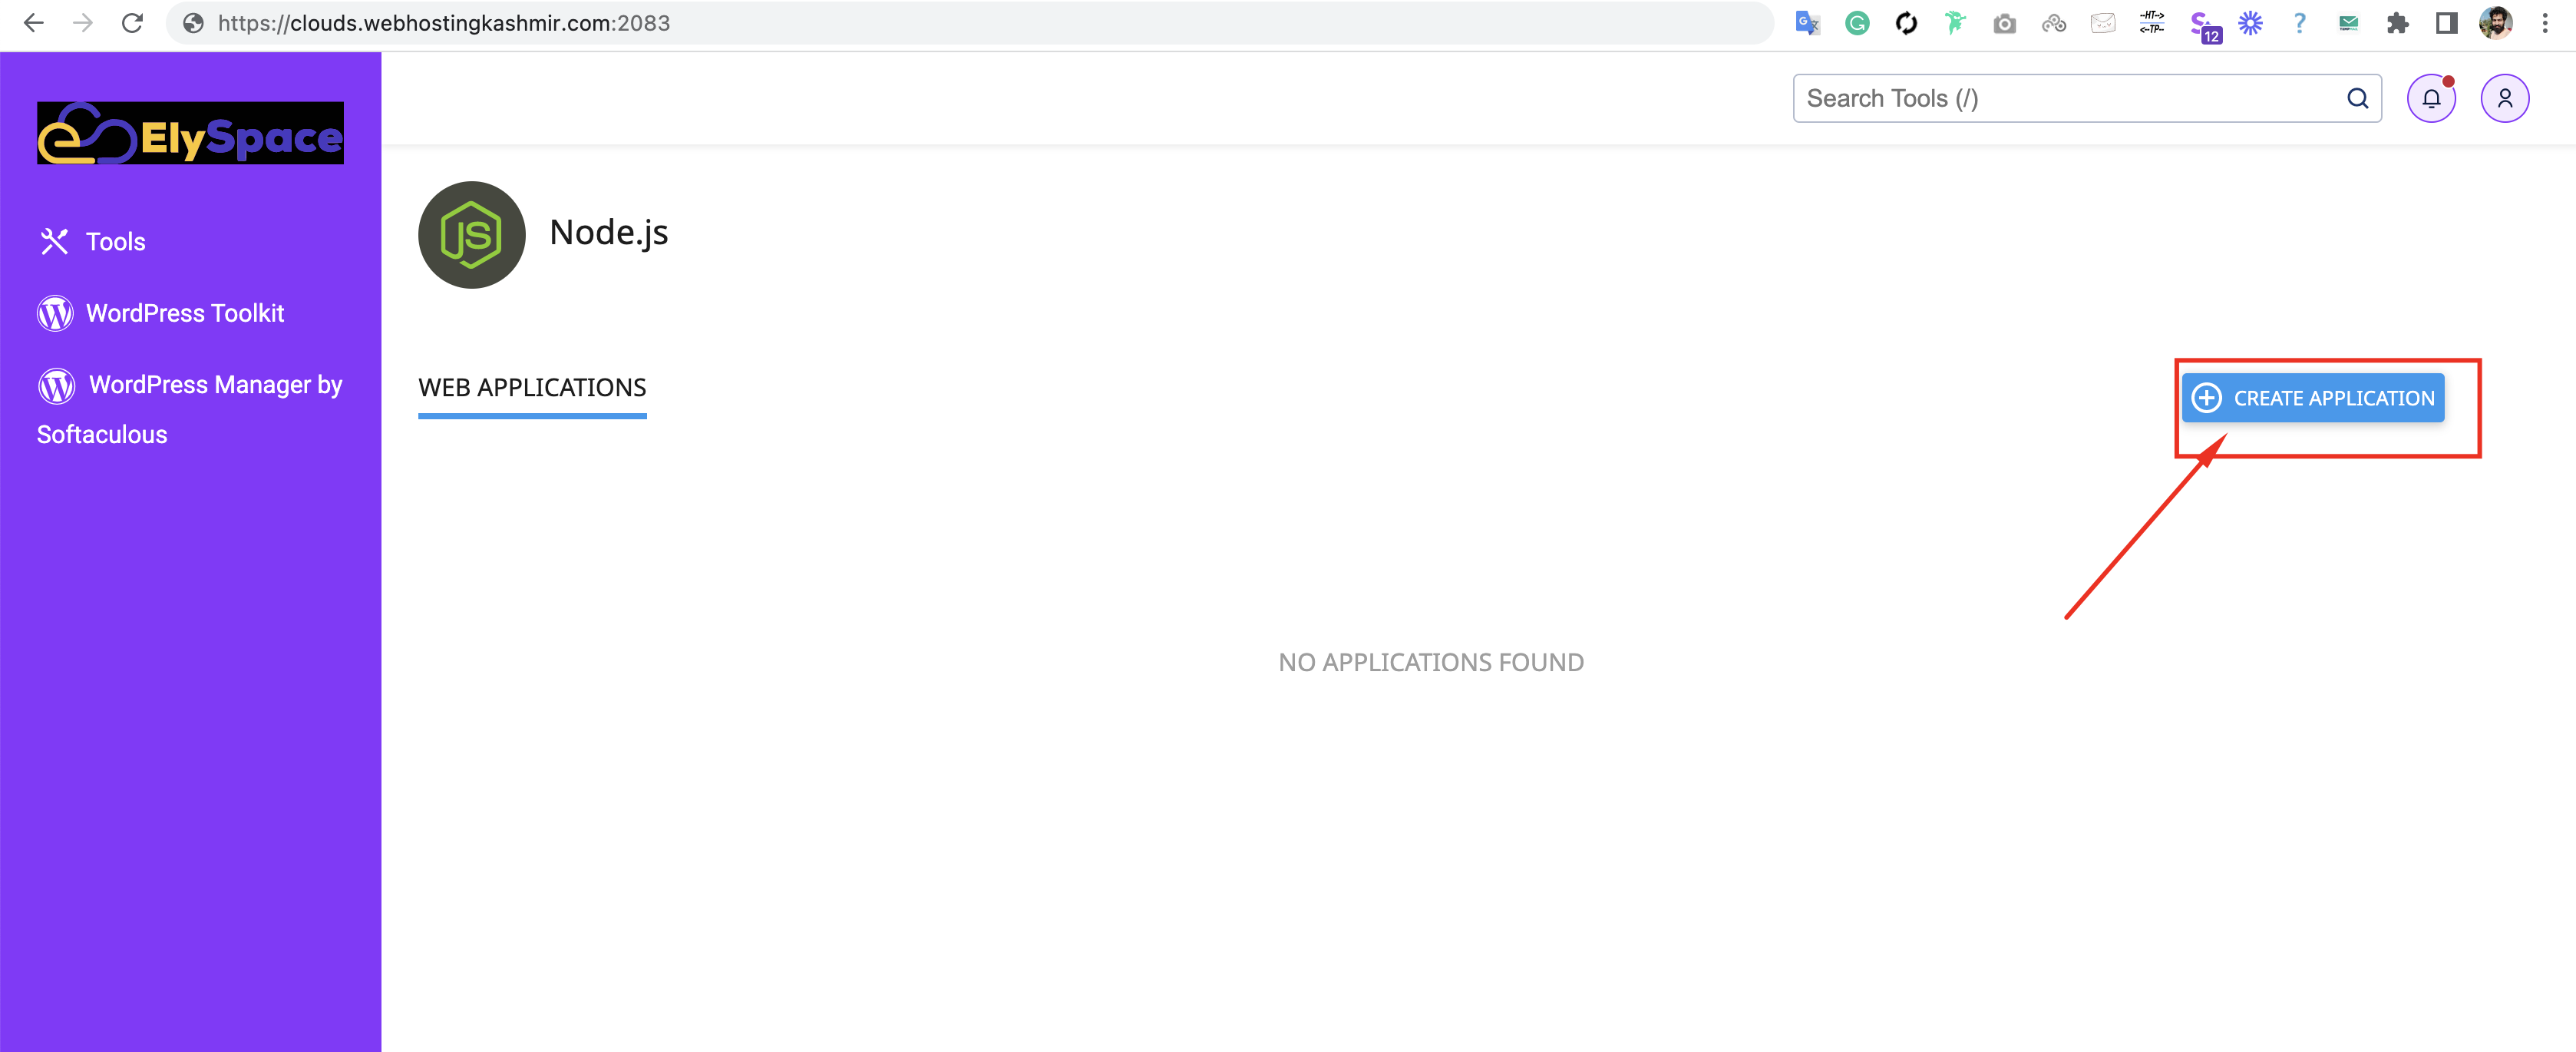
- Click Create Application.
- Fill in the Application Root field with the directory to upload your application files.
- Select the Application URL and startup file. If you don't specify a startup file, app.js is used by default.
- Fill in the remaining fields with your preferred values.
- Click Create.
Entering the Virtual Environment Command Line
You can log in to your server via SSH and enter your Node virtual environment if you need to perform administrative tasks from the command line. To do so:
- Copy the "source" command listed above your app settings.
- Log in to your server via SSH.
- Paste the "source" command into the command prompt and hit ENTER.
- You'll be logged into your Node virtual environment and will see a command prompt similar to [example-node-root (10)] [userna5@server-hostname example-node-root]$
Stopping and Restarting Your App
You can stop, restart, or edit your app at any time from the cPanel interface:
- Log in to cPanel.
- Go to Software and select Setup Node.js App.
- Select your app from the list of existing applications.
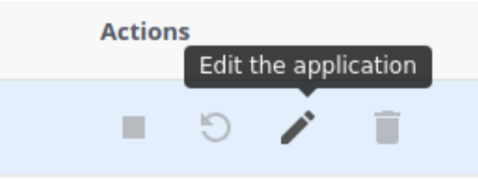
- Under Actions, click to stop, restart, or edit your application.
That's it! You now know how to set up a Node.js app in your cPanel.
